If Address book cannot add some contacts you may see the following error :
Unmatched number: User: ‘sip:lynctest@contoso.com’ AD Attribute: ‘telephoneNumber’ Number: ‘6567’
To fix this error, we need to create a normalization rule for numbers 6xxx, these rules are stored in a text file called Company_Phone_Number_Normalization_Rules.txt which is stored in the 1-WebServices-1\ABFiles\
NOTE: You should create Company_Phone_Number_Normalization_Rules.txt manually
Lync uses this file to convert phone numbers into E.164 format. In my example, ‘#’ = comments; ^(6\d{3})$ and $1 = normalization rule for 6xxx phone numbers . So, add your normalization rules and save file.
Sample of Company_Phone_Number_Normalization_Rules.txt:
To verify your rules you must use abserver.exe utility
Set-Location 'C:\Program Files\Microsoft Lync Server 2013\Server\Core'
.\ABServer.exe -testphonenorm "3456"
After successful verification you should update your address book:
– install Server 2008 R2 SP1 Core (i hope, you have already done it)
– change server name
– set NIC settings
– activate server
– turn on Windows Update Services and download/install the latest applicable updates
– turn on Remote Desktop connection to our server
– promote server to additional DC in existing domain
– check result
Installation steps
1. After successful installation Server 2008 R2 change your administrator password, log on to server and change server name using sconfig.cmd. Then restart your server.
2. Set static IP (recommended) or enable DHCP (don’t forget to reserve your ip on DHCP server) on your NIC using option 8 of sconfig.cmd
Select option 8 and your NIC indexChoose option 1 to set IP addressType D or S to use DHCP or Static IP Address
3. Use cscript c:\windows\system32\slmgr.vbs to your server activation
Use -ipk parameter to change your product key and -ato for activation with one
4. Turn on Windows Update Services and download/install latest updates using sconfig.cmd again
Select option 5 to set WSU for automatic searching updatesSelect option 6 to download and install updatesSelect A to download and install ALL applicable updatesWait while WSU downloads and installs ALL applicable update, then restart your server to apply ones
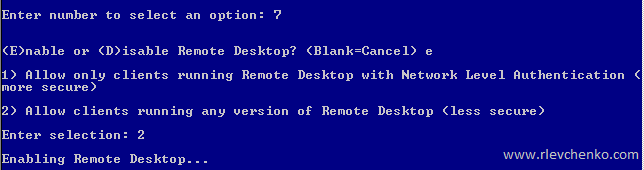
5. Enable RDP for remote management using sconfig.cmd option 7
Select option 7 > e to enable rdp and choose option 2 to allow any RDP versions
6. I hope, you read about unattanded installation domain controller (Unattended mode to install and remove Active Directory Domain Services) . So, we have to create additional file with configuration of promotion (dcpromo). Type notepad yourfilename.txt. By default, your file saves in %USERPROFILE%.
Paste to this file following strings (don’t forget to edit them 🙂 ) and save txt:
Then execute dcpromo /unattend:<path of the answer file>. Notice, after dcpromo implementation server will automatically reboot because of RebootOnCompletion=Yes.
7. Check dcpromo log for any warnings or error
Type cd %systemroot%\debug and open DCPROMO.LOG. Verify that there no any errors and warnings during replica creation
8. On your primary controller check that new server for replica has been added
WIN+R – type dssite.msc and check that new replica server has been added. Also , check new server properties for replica sources
9. Check DNS-records
Open DNS dnsmgmt.msc and check that A record has been added
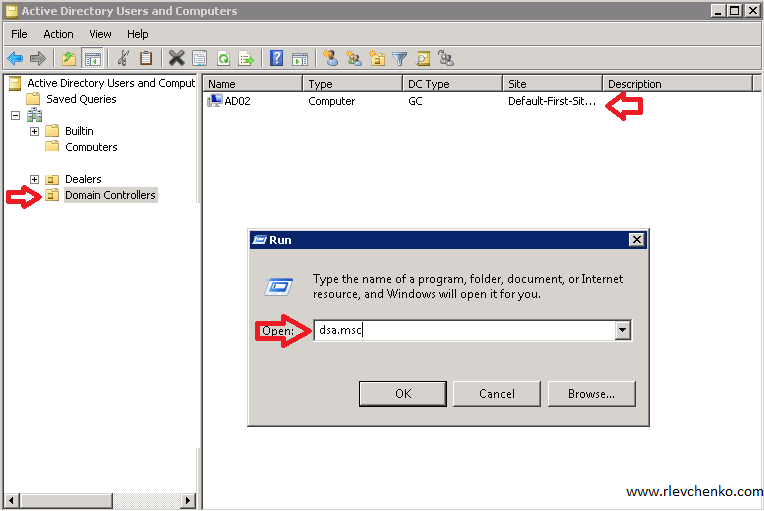
10. Check Domain Controller container in Active Directory Users and Computers
Open dsa.msc -> Domain Controllers and check that new DC has been added successfully
12. Our installation is complete. Thanks for your comments!