When running Kubernetes workloads in AWS EKS (or any other environment), you may encounter the Docker Hub rate limit error:
429 Too Many Requests – Server message: toomanyrequests: You have reached your pull rate limit. You may increase the limit by authenticating and upgrading
Why are Docker Hub rate limits a problem? Docker Hub imposes strict pull rate limits: authenticated users up to 40 pulls per hour; anonymous users up to 10 pulls per hour; no pull rate limits for only paid authenticated users
To check your current limit state, you need to get token first:
For anonymous pulls:

TOKEN=$(curl "https://auth.docker.io/token?service=registry.docker.io&scope=repository:ratelimitpreview/test:pull" | jq -r .token)

For authenticated pulls:

TOKEN=$(curl --user 'username:password' "https://auth.docker.io/token?service=registry.docker.io&scope=repository:ratelimitpreview/test:pull" | jq -r .token)
DaemonSets that run predefined configuration of each your k8s node
For AWS-based clusters, EC2 Launch Template and it’s user data input
For AWS-based clusters, AWS Systems Manager and aws:runShellScript action
You can update the config manually, however, in most cases the cluster nodes have a short lifetime due to autoscaler (use the shell script from daemonset below, containerd service restart is not required)
In this guide, we will find out how to define DaemonSets in AWS EKS with containerd (containerd-1.7.11-1.amzn2.0.1.x86_64) and Kubernetes 1.30
Check your containerd config at /etc/containerd/config.toml and make sure that the following is present config_path = "/etc/containerd/certs.d"
Containerd registry host namespace configuration is stored at /etc/containerd/certs.d/hosts.toml
The following manifest adds the required files and folders. Existing and future nodes will be automatically configured with the mirror by the DaemonSet. initContainer is used to update the node’s configuration, wait container is required to keep the DaemonSet active on nodes. Use taints and tolerations, change priority class or other fields to fit your requirements.
5. Apply the manifest to your cluster:kubectl apply -f containerd-registry-mirror.yaml , and then monitor the DaemonSet status kubectl get daemonset containerd-registry-mirror -n kube-system
6. To double-check, ssh to the node and get the content of /etc/containerd/certs.d/docker.io/hosts.toml
7. If you need to setup default mirror for ALL registries, use the following path /etc/containerd/certs.d/_default/hosts.toml
Hope it’s helpful for someone faced with the same issue.
Got questions or need help? Drop a comment or share your experience
Heptio (it’s founders co-created Kubernetes) polled about 400 IT decision makers from different sectors and company sizes to find out whether they use Kubernetes or not, understand obstacles and overall experience. About 60% of respondents are using Kubernetes today, and 65% expect to be using the technology in the next year. More surprisingly, about 77% of companies with more than 1000 developers that run Kubernetes are using it in production.
Furthermore, VMware has recently announced the Project Pacific that completely rebuilds vSphere architecture. Kubernetes is going to be a control plane in future vSphere versions. Sounds amazing, doesn’t it?
I hope you have warmed up and taken an interest in something that may not have been familiar with – Containers and Kubernetes. I believe so and recommend to read about Kubernetes and Docker concepts before we get started.
We’re gonna do some tasks in Azure Kubernetes Service (managed Kubernetes service in Azure) to help you to dive into Kubernetes and also get hands on experience with related services such as Container Registry, AKS, Terraform and Docker.
This GitHub Repo includes everything covered in this blog post
This lab uses a custom and simple ASP.NET Core web application that we will deploy to, and then publish by using Kubernetes (K8S)
Docker multistage image build packs up the application
Azure Container Registry stores the Docker image
Terraform automates deployment of Azure Kubernetes Service and Azure Container Registry. Scripts are stored at the different repo
Azure Kubernetes Services provides a managed Kubernetes master node in the cloud with ability to scale up worker nodes. AKS will host our PODs (roughly speaking, PODs represent process/containers running on k8s cluster)
Azure CLI, PowerShell, docker, terraform, kubectl (command line interface for running commands against Kubernetes clusters) are the main tools for completing tasks. Make sure you have them installed on your machine or use Azure Cloud Shell instead.
Create a Service Principal beforehand (Conributor role)
Azure DevOps is used for CI/CD (optional)
Deploy Kubernetes cluster in Azure
Although, we can use Azure Portal, CLI or PowerShell to deploy new Azure services, using Infrastructure as Code (IaC) approach is more visionary. We will use Terraform, so check out my repo and comments inside . Terraform creates Azure Container Registry:
#Get RG (create a new one if necessary by using "resource azurerm..")
data "azurerm_resource_group" "Rg" {
  name = "kubRg"
}

............

#Create a container registry
resource "azurerm_container_registry" "cr" {
  name                = "cr${random_string.randomName.result}"
  resource_group_name = "${data.azurerm_resource_group.Rg.name}"
  location            = "${data.azurerm_resource_group.Rg.location}"
  admin_enabled       = true
  sku                 = "Basic"
  # Only for classic SKU (deprecated)
  # storage_account_id  = "${azurerm_storage_account.storacc.id}" (Classic)
}
..............
Configures Kubernetes cluster with Azure Container Network Interface (CNI) to allow you to access PODs directly as every POD gets an IP from Azure subnet rather than use kubenet . At the end of configuration file, terraform enables K8S RBAC (it’s disabled by default in Azure) that we’ll use later during the service accounts creation.
Apply the configuration, and then check the output (in my case, resources have been already deployed, so nothing to add). Note ACR and AKS resource names (/managedClusters/…; registries/…)
For an additional deployment check , open up the Azure Cloud Shell or Azure CLI and type the following to open Kubernetes portal:
#Get Azure AKS Credentials
az login
az aks get-credentials --resource-group kubRg --name rlk8sclu-l3y5

#Open K8S dashboard
kubectl create clusterrolebinding kubernetes-dashboard --clusterrole=cluster-admin --serviceaccount=kube-system:kubernetes-dashboard
az aks browse --resource-group kubRg --name rlk8sclu-l3y5

#View kubectl config (optional, %HOMEPATH%/.kube/config)
kubectl config view
If your browser shows up a new page, likely there aren’t any issues with the deployment. Let’s jump into the second task.
TIP: get addresses of the master and services by running kubectl cluster-info
Make Docker image with the application
Let’s create a docker image with the application, and then push the image to the Azure Container Registry. The Dockerfile is located at the root of the aspnetapp folder (check out my repo) and describes multi-stage image build process. There is also the Dockerignore file to define folders that must be excluded from the image.
Run the Docker CLI and build the image (docker build <dir>):
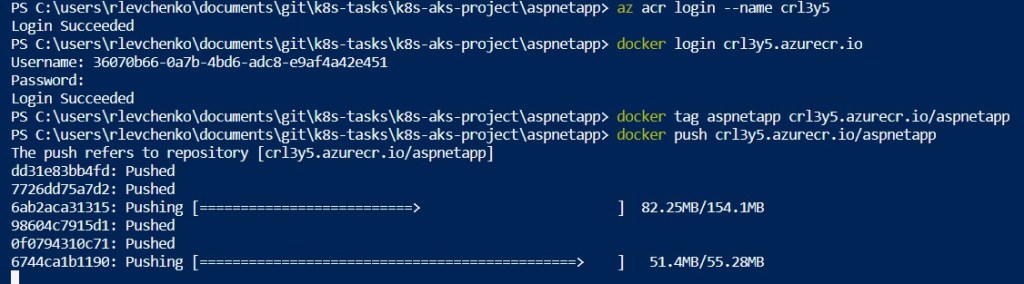
Push the image to Azure Container Registry:
az acr login --name acrName
docker login acrFQDN
docker tag aspnetapp acrFQDN/aspnetapp
docker push acrFQND/aspnetapp
TIP: get the attributes of the image by running az acr repository show -n crl3y5 –image aspnetapp:latest
Make two fully isolated namespaces within the Kubernetes cluster
Once the docker image is uploaded to ACR, we are ready to proceed with the Kubernetes tasks. When you need something to change in K8S you may use kubectl to define operations sequentially or manifests files (yaml) that can describe multiple requests to K8S API Server in the declarative form.
If you look at my repo, you can see two folders ns1 and ns2 that store yaml/manifest files for respective namespaces. We’ll use that files in conjunction with kubectl to make some changes on the AKS cluster. Because manifests files are almost the same, only manifests for NS1 will be shown.
#Apply the manifest (example)
kubectl apply -f pathToTheManifestFile
TIP: use kubectl get namespaces to list namespaces and kubectl get networkpolicy -n ns1 to get the policy
Configure anti-affinity for PODs
To make sure that group of PODs (labelSelector section) in the cluster running on particular nodes , we need to configure affinity/anti-affinity rules. This anti-affinity “rule” ensures that each POD with app=aspcore label does not co-locate on a single node.
TIP: use kubectl get pods -o wide-n ns1 to get info about assigned nodes, and then kubectl get nodes –show-labels to check node labels
Configure network policy to deny egress traffic from PODs (except DNS requests)
This task shows how you can filter network traffic from PODs in the namespace. All PODs with the app=aspcore label in the first namespace can make only DNS requests (out), other ones will be denied.
TIP: get list of the network policies kubectl get networkpolicy -n ns1
Create a service account with read permission on PODs in the first namespace
A service account provides an identity for processes that run in a Pod. This except of manifest file describes a service account read-sa-ns that has read only permissions on PODs in the NS1 namespace (the rules section/verbs). Also, note that rbac role is used which we have enabled during applying the terraform configuration.
#New SA - ns level
apiVersion: v1
kind: ServiceAccount
metadata:
  name: read-sa-ns
---
#New Role - ns level
apiVersion: rbac.authorization.k8s.io/v1
kind: Role
metadata:
  name: read-only-ns
  namespace: ns1
rules:
  - apiGroups: ["", "extensions", "apps"]
    resources: ["pods"]
    verbs: ["get", "list", "watch"]
---
#Binding the role to the sa -NS1
apiVersion: rbac.authorization.k8s.io/v1
kind: RoleBinding
metadata:
  name: read-ns1-pods
  namespace: ns1
subjects:
  - kind: ServiceAccount
    name: read-sa-ns
    apiGroup: ""
    namespace: default
roleRef:
  kind: Role
  name: read-only-ns
  apiGroup: rbac.authorization.k8s.io
TIP: get roles in the NS1 namespace kubectl get role -n ns1 , and then check service accounts in K8S cluster kubectl get serviceaccounts –all-namespaces
Set CPU and RAM limits for each pod
If a container is created in the ns1 namespace, and the container does not specify its own values for memory request and memory limit, the container is given a default memory request of 128 MiB and a default memory limit of 400 MiB. In addition, you can define limits on the PODs level.
TIP: check the limits by running kubectl describe pod podname -n ns1
Configure PODs scalability based on CPU metric
Kubernetes allows you to automatically scale PODs based on the CPU/RAM metrics (horizontal pod autoscaler). If CPU average utilization is equal or greater than 70%, K8S deploys additional replicas (spec stenza, maxReplicas).
TIP: to list the NS limits kubectl describe namespace ns1
Publish the application
Now it’s time to publish the application running on a container. First, create a POD that will use our docker image that we’ve already pushed to the Azure Container Registry. A one Pod with the latest image will be created under the ns1 namespace. Check labels (one of the most important things, actually in K8S 🙂 ) , pod name and number (replicas)
TIP: use kubectl get pods -n ns1 -o wide to check the pod state in the ns1
If the Pod’s status is running, you can publish it via the LoadBalancer service:
#Publish the deployment through the Service

apiVersion: v1
kind: Service
metadata:
  name: demo-service1
  namespace: ns1
spec:
  selector:
    app: aspcore
  type: LoadBalancer
  ports:
    - name: name-of-the-port
      port: 80
      targetPort: 80
Then check the deployment status, and get public ip of the service:
#Get deployments in the NS1
kubectl get deployments -n ns1

#Get Service's Public IP
kubectl get service -n ns1 -o jsonpath='{.items[].status.loadBalancer.ingress[0].ip}'
Open up the browser and navigate to http://publicip/api/values to verify that application is published and works:
What’s next?
Complete the following homework tasks to boost your skills:
Make atest POD with a static volume (use Azure storage)
Make sure that PODs are running under non-root account
Create a service account with read permission on all PODs in the cluster
Add context details about service accounts to your configuration file (kubeconfig), and then verify service accounts permissions
Configure PODs scalability based on RAM or network metrics