Howdy, guys! Today, I’d like to show you how to configure IIS along with ARR to publish and secure your Jenkins portal with HTTPS and SSL. Going forward, make sure that your site name (jenkins.pro, in my case) is publicly available (every external Certificate Authority requires domain validation before generating a SSL-certificate for your site. Otherwise, you can use a self-signed certificate for demo purposes (as it shown later in this post).
TIP: to get a SSL-certificate, you can use a completely free Let’s Encrypt CA (windows ACME tool located here , download it and extract the archive, and then run the wacs.exe application to create new certificate (see the screenshot below)) or comodo free SSL certificate for 90 days . Be careful! LetsEncrypt has some rate limits. For example, there is a Failed Validation limit of 5 failures per account, per hostname, per hour and if you’ve hit a rate limit, you don’t have a way to temporarily reset it. You’ll need to wait until the rate limit expires after a week

Prepare your environment
- Install and configure Jenkins (it it’s not yet done)
- Add Web Server (IIS) server role with the default settings + HTTP Redirection and WebSocket Protocol
Install-WindowsFeature Web-Server,Web-WebServer,Web-Common-Http,Web-Default-Doc,Web-Dir-Browsing,Web-Http-Errors,Web-Static-Content,Web-Http-Redirect,Web-Health,Web-Http-Logging,Web-Performance,Web-Stat-Compression,Web-Security,Web-Filtering,Web-App-Dev,Web-WebSockets,Web-Mgmt-Tools,Web-Mgmt-Console -IncludeManagementTools
- Download and install URL Rewrite and IIS ARR
- My machine is not in the domain, so I need to edit my hosts file (C:\Windows\System32\drivers\etc\hosts) and add a new line as follows: 127.0.0.1 jenkins.pro
- Create a self-signed certificate or use the certificate provided by public CA (as we briefly discussed in the beginning). I also recommend to add created certificate to the Trusted Root Certification Authorities to avoid any warning messages in browsers.
New-SelfSignedCertificate -DnsName "jenkins.pro" -CertStoreLocation "cert:\LocalMachine\My"
Configure IIS and ARR
Open IIS manager (InetMgr.exe), go to the Default Web Site – Actions – Bindings and add a new site binding for HTTPS type (use the certificate created earlier). Then, edit HTTP binding by typing a hostname (might be used by ACME tool while generating a certificate)

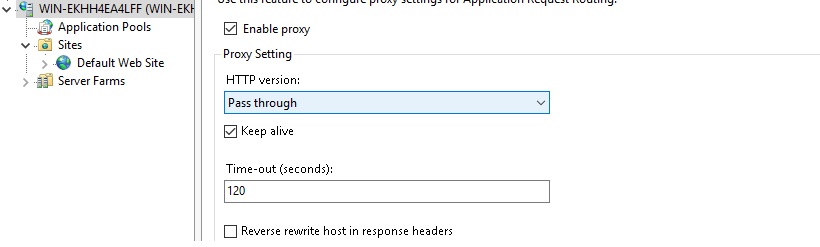
Click on the IIS server name, go to Application Request Routing Cache – Server Proxy Settings and Enable the Proxy, disable
Reverse rewrite host in response header , and then click Apply
Navigate to the Default Web Site – URL Rewrite -View Server Variables... and add the a new variable named as HTTP_FORWARDED.
Go back to rules, and add a new reverse proxy rule, type a site name (jenkins.pro, in my case) and click OK. Doble-click on the created rule and define a condition input {CACHE_URL} with the following pattern ^(http|ws)s:// , and then add server variable HTTP_FORWARDED with the following value for={REMOTE_ADDR};by={LOCAL_ADDR};host=”{HTTP_HOST}”;proto=”https”
Then, we need to define how to rewrite URL under action:
{C:1}://jenkins.acme.example:8080{UNENCODED_URL}
and remove the Append query string check

Go to Application Pools and change .NET CLR Version to No Managed Code
Then go back to the Default Web Site and select Request Filtering – Edit Feature Settings and turn on Allow double escaping
In the Default Web Site → Configuration Editor change the Section to system.webServer/rewrite/rules , and change useOriginalURLEncoding to False
Configure Jenkins
Once you finished with IIS/ARR configuration, we need to set Jenkins to enable the proxy and work with a new URL (https://jenkins.pro, in my case). Carry out the following steps:
- Open Jenkins portal, go to Manage Jenkins – Configure Global Security enable Prevent Cross Site Request Forgery exploits and proxy compatibility
- In the Configure System, define a new URL under Jenkins location that should be used by Jenkins (https://jenkins.pro, in my case), and then apply the changes
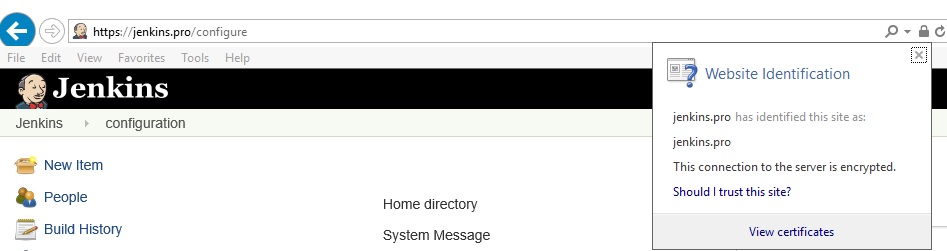
- Open a new tab in the browser and verify that you can access the Jenkins by using the new URL and HTTPS
P.S. this post is based on the wiki article that contains a bit more details https://wiki.jenkins.io/display/JENKINS/Running+Jenkins+behind+IIS


