*If you have questions about nlb and arrays , please contact me I’ll help you with pleasure. *
Some words about…
TMG was released on November of 2009. Since that time, it has become the most important part of network infrastructure as a proxy server, reverse proxy for publishing, edge to prevent external attacks, internal traffic control tool and etc.Unfortunately,
on Sept. 12, 2012, Microsoft announced changes to the roadmaps of several Forefront products, including the discontinuation of Forefront Threat Management Gateway 2010. Microsoft will continue to provide maintenance and support for Forefront TMG server through the standard Microsoft support lifecycle – mainstream support will end on April 14, 2015 and extended support will end on April 14, 2020. Forefront TMG Web Protection Services support will end on January 1, 2016.
So, Microsoft offers to use third-party products or purchase Microsoft UAG to provide full or partial TMG functionality (UAG includes TMG Services and install them automatically during deployment) Despite of TMG discontinuation, it is the popular solution to providing external access to your internal Web Services especially based on Microsoft Server Products. Therefore, I hope that the information obtained from this article will be useful for you too.
There are four parts of article:
– deployment TMG and installing updates (you are here)
– configuring TMG array with domain
– setting up TMG array in workgroup
– creating NLB-cluster and routing rules + deploying TMG agents
Deployment TMG and installing updates

TMG backend : TMGINT1.domain.com.local, TMGINT2.domain.com.local
TMG Edge: tmgext1, tmgext2
Don’t hurry up
TMG installation is not difficult, but first we have to prepare the network topology according with the best practices. In my tolopogy there are three types of network adapters : Internal (LAN), Perimeter (private network between external and internal TMGs) and External (network to receive incoming requests to published servers). Depending on the type of network adapters, set up your NICs on EVERY target servers with the following recommendations:
Internal Network Adapter:
- DNS Servers should be defined (use your local DNS addresses)
- File and Print Sharing for Microsoft Networks binding – Disabled
- Enable LMHOSTS Lookup – Disabled
- NetBIOS over TCP/IP – Default
- TCP/IPv6 – Disabled


Perimeter Network:
- DNS Servers should not be defined*
- Client for Microsoft Networks binding – Disabled
- File and Print Sharing for Microsoft Networks binding – Disabled
- Register this connection’s address in DNS – Disabled
- Enable LMHOSTS Lookup – Disabled
* only for internal TMG (tmgint1 and tmgint2). On TMG edge define your internal DNS
External Network:
- Default Gateway should be defined
- DNS Servers should not be defined
- Client for Microsoft Networks binding – Disabled
- File and Print Sharing for Microsoft Networks binding – Disabled
- Register this connection’s address in DNS – Disabled
- Enable LMHOSTS Lookup – Disabled
- TCP/IPv6 – disabled
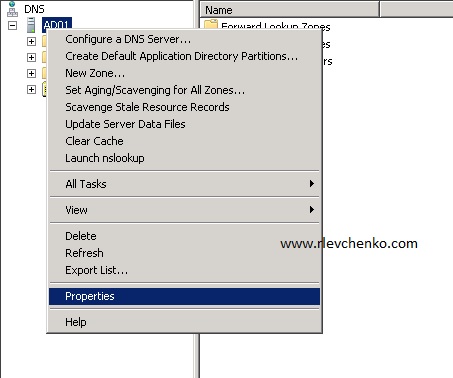
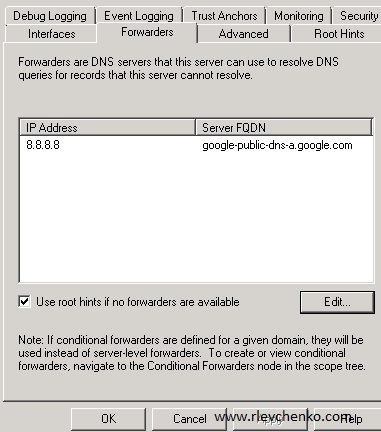
DNS Configuration:
Open your DNS MMC and define forwarder. Forwarder uses for resolving all names that our internal DNS server cannot resolve.
Now we are ready for installation TMG services
TMG INSTALLATION (INTERNAL SIDE: tmgint1)
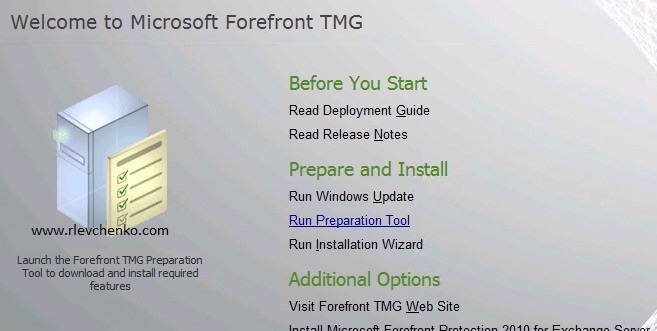
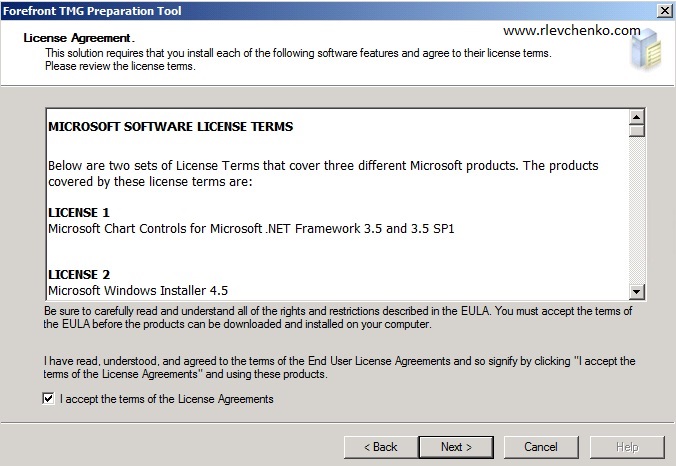
1. Mount your TMG ISO and run splash application. Next “Run Preparation Tool“.
TMG use :\FPC\PreRequisiteInstallerFiles\*.xml files to prepare your server. For example, Server 2008 xml file consists following strings:
–
You can see what roles are necessary for TMG and can install them manually or from server manager before.But It’s really necessary. Preparation tool installs them automatically.


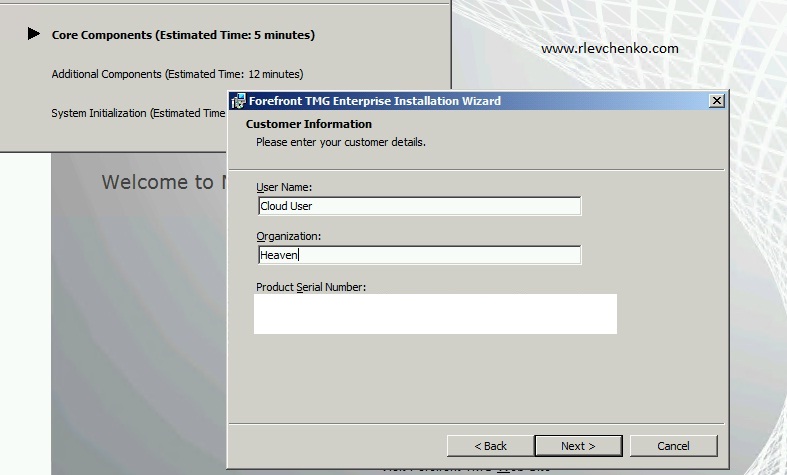
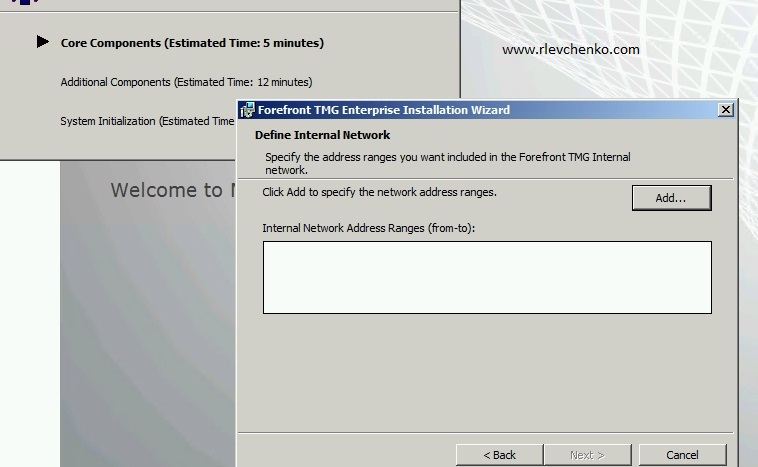
2. TMG services installation
In the previous step we prepared our server for TMG services installation. During preparation , wizard installed required NPAS-Policy-Server,NPAS-RRAS-Services,ADLDS roles and NLB feature. TMG preparation tool also checked for an Powershell installation.Now, Let’s move on to the next step – installation TMG services.


3. Updating TMG Services
We successfully installed TMG 2010 services (in my case, RTM version). I had an experience with the RTM version of TMG and it was like a nightmare! For example, TMG Firewall service is stucking , web proxy is slow like an IE 6.0 with a dial up channel :). Thanks to Microsoft update service , these bugs has already fixed. Remember, If you don’t want to have unexpected issues with server product (not only TMG) in production – you must install the latest SP with CU before configuring. For successfully updating TMG you have to follow ONE RULE : use CMD and install updates in the right order (sp1->upd1->sp2->ru3)!
You can download updates separately or use my skydrive to download ISO (English):
Updating to SP1 (don’t forget to run SP1 update in CMD!)


Repeat 1-3 steps on another internal server (tmg-int-2, for me) and both external servers. Use perimeter network like an internal network during TMG installation on external servers.
In the next part, I will show you how to configure TMG array in domain environment.
Thanks for your questions and replies!

What happened to Part 2?