Before deployment you have to:
– install IIS, BITS on your SCCM server
– open 1433 and 4022 ports on SQL Server
– create “System Management” container with right permissions
– extend AD schema
– check SQL Server settings
Read “How to..” below. Wait,wait and carefully read and check
Supported Configurations for Configuration Manager
Notice, only SCCM SP1 fully supports Windows 8 and Server 2012.
Microsoft is going to publish final release SP1 in January,2013 (i hope so). Now, it’s only SP1 Beta with some bugs inside
To resolve error with installing NETFX3 feature on Windows Server 2012 use my previous post about preparation and installing DPM 2012
———————
Open 1433 and 4022 ports on your SQL Server. Without this step you will receive an error “Firewall exception for SQL Server”
netsh advfirewall firewall add rule name=”SQL Server” dir=in action=allow protocol=TCP localport=1433
netsh advfirewall firewall add rule name=”SQL Service Broker” dir=in action=allow protocol=TCP localport=4022
———————
You need to install BITS and IIS services (default settings+IIS 6 WMI Compatibility) on your SCCM server
Install-WindowsFeature Web-Common-HTTP,Web-Default-Doc,Web-Dir-Browsing,Web-HTTP-Errors,Web-Static-Content,Web-HTTP-Redirect,Web-HTTP-Logging,Web-Log-Libraries,Web-Request-Monitor,Web-HTTP-Tracing,Web-Stat-Compression,Web-Filtering,Web-ISAPI-Ext,Web-Mgmt-Tools
Install-WindowsFeature -Name BITS
———————
SCCM does not automatically create the System Management container in Active Directory Domain Services when the schema is extended. The container must be created one time for each domain that includes a Configuration Manager primary site server or secondary site server that publishes site information to Active Directory Domain Services.
SCCM server account must have “Full Control” permisson on System Management container. You can add this permission leter, but SCMM installation will detect warning “Verify site server permissions to publish to Active Directory” and let you to continue setup.
Open adsiedit.msc

Right click on “CN=System” and create new object

Select class “Container” and click “Next” e
e
Type the name of container “System Management” and Next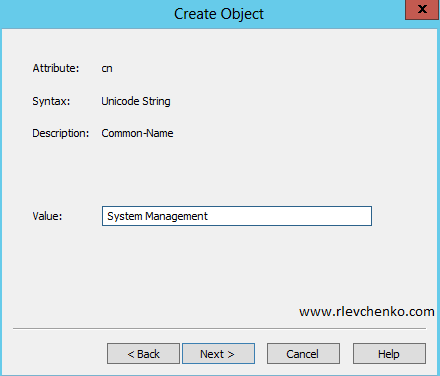
Open your AD Users and Computers, change view to “Advanced feature”. 
Go to System -> System Mananagement and click on “Delegate control..”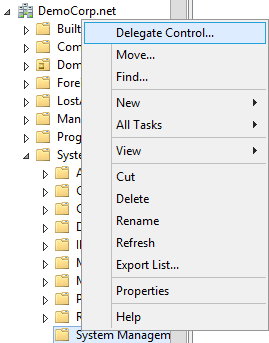
Add your SCCM server to delegation of control
Select “Create a custom task …”
Click “Next”
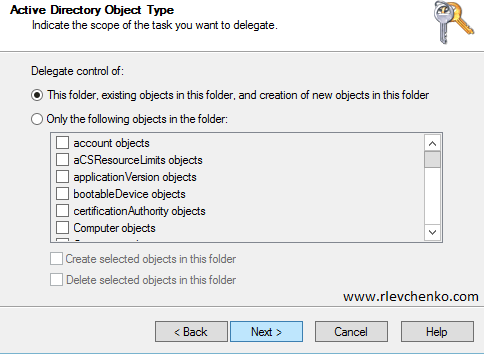
Select “Full Control” and click “Next”

———————
Extend AD schema for SCCM. If you have installed SCCM 2007, you do not have to extend AD schema!
Open extadsch.exe in YourCDdriveLetter:\SMSSETUP\BIN\X64
Check result using log file C:\ExtAdSch.txt
———————
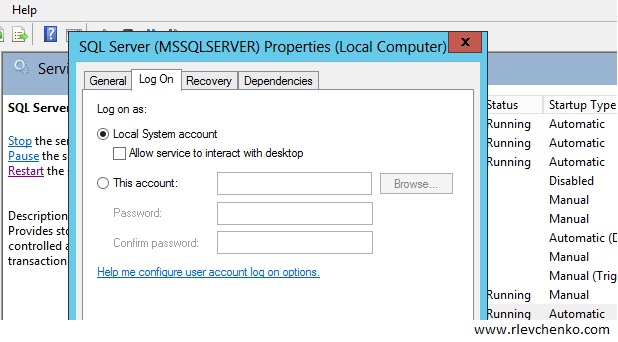
Check your SQL Server service account. By default, SQL sets build-in account to run SQL Server service. This account does not have necessary permissions (sysadmin role in SQL) that SCCM wants to see. For example, during installation SCCM interrupts with following error:
Fail to create SQL Server Certificate, ConfigMgr cannot be completed

To resolve this you have to temporarily change service account . In this example, my local account have sysadmin role in SQL Server. After successful SCCM installation do not forget to change it back.
SCCM requires SQL Server to reserve a minimum of 8 Gb of memory for the central administration site and primary site and a minimum of 4 Gb for the secondary site. Without SQL Server memory settings SCCM prerequisites checker will show you warning:
SQLServer is configured for unlimited memory usage
Just set minimum and maximum of memory in SQL Server settings using SQL Server Management Studio as shown on picture

INSTALLATION
1. Choose your deployment method and click “Next”. Do not choose typical installation. Some important settings are not covered in this method.
2. Type your product key
3. Accept all license terms
4. Click on “Browse” to set path for downloaded required files or download them automatically using setting above and click “Next”
5. Select your SCCM languages and click “Next”
6. Select your client languages and click “Next”
7. Define Site code (xxx) and name , click “Next”
8. Join or create new primary site. Click “Next”
9. Define your SQL FQDN, instance name (just leave it blank) and database name
10. Click “Next” again
11. I don’t have a PKI infrastructure, so i choose use HTTP server communication
12. Click “Next”
13. CEIP is a useful program, but now ” i don’t want to join…”. Click “Next”
14. Summary information. Click “Next”
15. I checked manually that my SCCM server have Full Control in “System Management” containter. WSUS SDK warning related with version of WSUS services. Just ignore it or update your WSUS.
16. Done!
Don’t forget to update SCCM Server before your configuration! http://support.microsoft.com/kb/2706783 or just wait to SP1 release 🙂
Leave your comments! Thanks!

Works!
thx
Great Write Up!! this is exactly what we found was required to make it work!!